|
Heathfield Castle Skill Levels (Dice setup for levels of achievement in skill. The idea is to make it realistic as possible in using dice which are not realistic but a means online to measure and determine a win or loss, excluding what is realistic at times in the process at times.) Dice
Aid Levels * Jousting
* Hand to Hand * Swords * Highland
Games * Gauntlet
& O'Gawd-let GAUNTLET
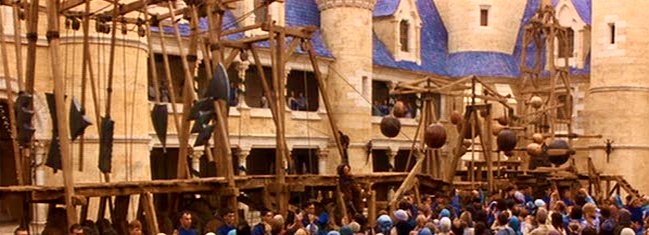
RULES 1d20 dice used for the first roll, if the qualifying roll for a section is not met a 1d10 dice is used for a save; only one save per section allowed. Those wishing to enter the O'Gawd-let and get in the queue, will IM Aiden ColIins that night. Roll of die is done before text entry of action/words (or inbetween) so you know what is cast and can role play it accordingly. Be creative. Example text for dice - //roll-dice1-sides20 (or 10, or 100) or use keyword: dice roller. A section must be completed successfully to gain points. _______________+++_______________ First Section (2 points): 5+ to manage the Shifting Platform. Planks move up and down, dipping forward, backwards and side to side. While you are concentrated on the moving floor watch out for the swinging padded arm willing to knock you off into the piles of hay if the uneven floor doesn't send you there first.. A 1d10 use for a save, needing a 4+ to be successful in avoiding being sent off the side. Second Section (3 points): 7+ to manage the Ejection Traps. Sections of floorboards can give way at any time, shooting up into the air a good six feet on giant springs. To add to difficulty, pebbles and acorns shower down, making the foot hold more precarious still. Will you slip and fall, be ejected in the next step or manage to hold on keeping your footing to the next sections. A 1d10 use for a save, needing a 5+ to be successful in hanging in there. Third Section (5 points): 9+ to manage the Bumper Spindles with large padded bumpers. You will need to dart, duck and turn quickly to avoid the arms with the large bumpers of two spindles at one point overlapping. If you get hit, you'll get launched onto piles of hay along the sides unless you can hold onto the spindle's arm taking you to the other side. A 1d10 use for a save, needing a 6+ to be successful in holding on. Fourth Section (7 points): 12+ to manage the Large Balls. Oversized and made of steel as they swing around at random, no pattern. On top of that, some of the floor slats are not fastened down in a way, you step on it just right it can flip up behind or in front of you. Can you managed not being whacked and thrown off the side? A 1d10 use for a save, needing a 7+ to be successful in managing to stay grounded if hit and make it to the next section. Fifth Section (10 points): 15+ to manage the Floor Spikes. Poles with blunt ends will shoot up randomly through the floor. Notice those holes? Don't get your foot caught let along your chin hit in a punch knocking you off the platform and into the piles of hay to soften your fall. A 1d10 use for a save, needing a 8+ to be successful in keeping from getting knocked off. Final Section (15 points): 18+ to manage the Pendulum Blades. You are lastly greeted with the sound of rhythmic swishing of very large blades hung on pendulums. There are eight in total and all timed differently, some swinging from left to right and some swinging from right to left. The timing between is crucial to coordinate. Your timing and protective gear worn, the only padding between being sliced in half or impaled otherwise. A 1d10 use for a save, needing a 9+ to be successful. If successful, you only get nicked, perhaps a slice taken from the padding worn as you step out onto the finish platform with steps leading down. O'GAWD-LET
RULES 1d20 dice used for the first roll, if the qualifying roll for a section is not met a 1d10 dice is used for a save; only one save per section allowed. Those wishing to enter the O'Gawd-let and get in the queue, will IM Aiden ColIins that night. Roll of die is done before text entry of action/words (or inbetween) so you know what is cast and can role play it accordingly. Be creative. Example text for dice - //roll-dice1-sides20 (or 10, or 100) or use keyword: dice roller. A section must be completed successfully to gain points. _______________+++_______________ First Section (2 points): 5+ to manage the Hanging Ceiling of water balloons with poles of nails at the top rotating on the moving circular floor as you make your way across. Watch out for the elusive trap door that breaking a balloon will trigger and have you plunging into a water tank beneath and out of the run unless you can grab onto a pole and keep from falling through. A 1d10 use for a save, needing a 4+ to be successful in avoiding the trap door. Second Section (3 points): 7+ to manage the Cream Bridge once up the steps with dozens of little flags along the walk, some of which will trigger the huge spray gun of whip cream. If you get creamed the bridge becomes slippery to manage and you may end up sliding down the shoot into the large water trough below if not careful. A 1d10 use for a save, needing a 5+ to be successful in hanging in there. Third Section (5 points): 9+ to manage the Water Spindle with large balloon bumpers. You will need to dart, duck and turn quickly to avoid the arms with the large water sacs. If you get hit, you'll get wet and launched onto piles of downy feathers unless you can hold onto the spindle's arm taking you to the other side. A 1d10 use for a save, needing a 6+ to be successful in holding on. Fourth Section (7 points): 12+ to manage the Small Geysers. Water shoots up through holes in the flooring at random, taking turns in a fast pace, sometimes two or three at time and no discerning pattern. Too many holes under the mesh to know which one will be next. If you manage to block the stream of water it will activate the cylinders above having them turn to dump what they hold. Slippery seaweed starts pouring out in large clumps over all below. Can you still manage getting to the other side? If not you slide off with a huge clump into the large pile of the same off the side of the run. A 1d10 use for a save, needing a 7+ to be successful. Fifth Section (10 points): 15+ to manage the Gel Slide. Here you need to climb over ale barrels to get to the last section. They are not too big and may well look easy but if you get them rolling they will pop spewing ale as the tarp above angles down coating you with Piña Colada flavored gel (non-alcoholic) while the floor tips. Can you managed on your hands and knees to the other side or roll out with the barrel onto the now foam drenched cushions? A 1d10 use for a save, needing a 8+ to be successful in keeping from getting thrown onto the cushions. Final Section (15 points): 18+ to manage the Tidal Wave. You are lastly greeted with the sound of rushing ocean water where you'll notice there is a funnel beneath that if you are fast enough you can make it to the other side. Seems easy but did you notice all those green and blue dots along the ten foot plank? Some can alter the flow of the Wave, losing the funnel beneath and taking you away down a smooth ramp and into the pond. Can you reach that hanging rope and hold on instead of going with the flow? A 1d10 use for a save, needing a 9+ to be successful. If successful, you manage to hold onto the rope until the wave is done and the plank safe to finish crossing. This setup of dice and scoring is copyrighted by Lahoneee |